
How to Write a Cutting List for CNC (and Save Sheets)
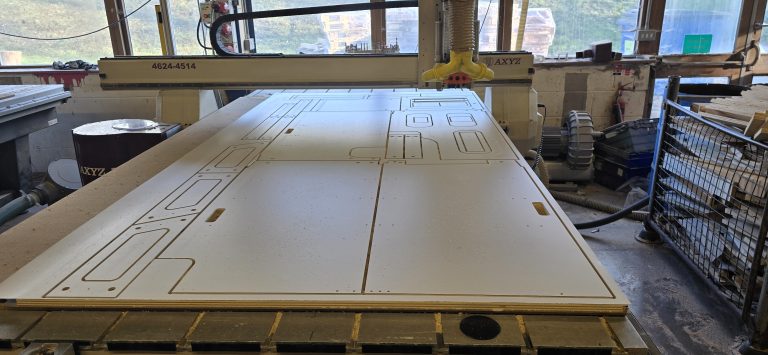
The short answer: For each part, give a label, the finished length × width in mm, the quantity, the board (decor, core and thickness) and which edges are banded. For woodgrain decors, say which dimension runs with the grain. Don’t add anything for saw cuts. If a part has curves or holes, send a DXF drawing with the list. We nest the parts onto whole sheets and send a quote with a sheet layout showing how they fit.
What to put on each line
| Column | What to put | Example |
|---|---|---|
| Label | A short code for the part | A1 |
| Part | What it is | Base unit side |
| Length | Finished size in mm. On woodgrain, the size that runs with the grain | 720 |
| Width | Finished size in mm | 560 |
| Qty | How many | 2 |
| Board | Decor, core and thickness | Your decor, 18mm birch ply |
| Banded edges | Which edges get edge banding | 1L |
| Notes | Anything else, such as holes or a drawing number | See drawing 1 |
A short list for one cupboard, all in one decor on 18mm birch ply, might look like this:
| Label | Part | Length | Width | Qty | Banded edges |
|---|---|---|---|---|---|
| A1 | Side | 720 | 560 | 2 | 1L |
| A2 | Base | 764 | 560 | 1 | 1L |
| A3 | Shelf | 764 | 520 | 2 | 1L |
| A4 | Door | 715 | 396 | 2 | 2L 2S |
Finished sizes, length first
Give the size you want each part to end up, in mm. Put length first, then width, and keep that order on every line. Use millimetres throughout. A list that mixes mm, cm and inches is where mistakes happen.
Don’t add anything for the saw cut, and don’t take anything off. The CNC nesting allows for the width of the cut, so just list the sizes you want the parts to be.
Marking banded edges
A common way to show banding is by long and short edges. “1L” means one long edge, “2L 1S” means both long edges and one short edge, and “none” means no banding. If it matters which edge is banded, such as the front of a shelf, add a note or mark it on a sketch.
When we’re banding the edges, give the finished size with the banding on, and we allow for its thickness. The one exception is a part with a curved edge: take the banding thickness off that part’s size. Ask us if you’re not sure how thick the banding is.
We use colour-matched edge banding, applied by machine on straight edges, on boards up to 50mm thick, in the same job as the cutting. Curved parts can be banded by arrangement, but they take a lot longer, so ask us first. More on our edge banding page, and in our guide to finishing the edges of laminated plywood.
Grain direction on woodgrain decors
Woodgrain decors have a direction, and the grain usually runs along the 2440mm length of the sheet. On each woodgrain part, say which dimension runs with the grain. The simplest way is to always put the grain dimension first, as the length, and say so at the top of your list.
Plain colours have no grain, so those parts can be turned whichever way fits the sheet best, which often saves board. If a woodgrain part can go either way, for example a panel hidden inside a cupboard, say so and it can be turned too.
Label every part
Give each line a short label, like A1, A2, B1, and use the same labels on any drawing. It makes the sheet layout easy to check against your list, and “B3” is quicker to talk about on the phone than “the narrow shelf on the left”. On a bigger job, use one letter per unit.
Shapes, holes and DXF drawings
A list works for rectangles. If a part has curves, cut-outs, rounded corners or holes, send a DXF drawing as well, drawn full size in mm, with each part marked with the label from your list.
We can work from a sketch too, but it takes longer, and the quote will say so.
Keep parts within a sheet
Our sheets are 2440 × 1220mm, and we keep 10mm clear all round the edge, so the biggest part we can cut from one sheet is 2420 × 1200mm. If you need something longer, such as a long worktop, plan where the joint will go and list it as two parts.
How to save sheets
- Group by board. Each mix of decor, core and thickness goes on its own sheets. Using one decor or one thickness across more parts gives the nesting more to fit together.
- Let plain parts turn. Only fix the direction of parts where the grain matters.
- Say if a size can change. If a shelf could be 20mm narrower, put it in the notes. Sometimes a small change saves a whole sheet.
- Check the layout. Our quote comes with a sheet layout showing how the parts fit. If the last sheet is mostly empty, that’s the time to look again at your sizes, or add parts you’d need later anyway.
- Keep your offcuts. You can keep the offcuts if you want them. They’re handy for small parts and test pieces.
What a sheet layout looks like
This is the layout from a real kitchen job: 13 parts in FENIX on 18mm birch ply, nested onto two 3050 × 1220mm sheets, including an L-shaped end wall panel with a small radius in its inside corner. Each part is numbered to match the customer’s list, so it’s easy to check every size before we cut, and the beige areas are the offcuts that come with the boards.
Sending us your list
Email your list and any drawings to contact@uklaminating.co.uk, or ring 01752 341 478 if you’d like to talk it through first. Tell us your decor, and either your delivery postcode or that you’ll collect free from our workshop in Plympton, Plymouth. Cutting and edge banding are priced on quote. Our cut to size and CNC cutting pages have more detail, and our guide to cutting laminated board without chipping covers doing it yourself.
Every board is pressed to order, with a normal turnaround of two weeks from order. To pick a decor first, order a free sample of any of our 750+ decors.
Ready to order?
Send us your cutting list and we’ll quote with a sheet layout, or try the decor first with a free sample.