
How to Cut Laminated Board Without Chipping
The short answer: Use a sharp, fine-tooth blade with a TCG or Hi-ATB grind, put the good face on the side the teeth enter, and make a shallow scoring cut before the full cut. Support the sheet on both sides of the line and feed slowly. Our boards are laminated on both faces as standard, so the face the teeth come out of needs protecting too. For curves and scribed edges, the cleanest finish of all comes from a router following a template.
Why laminate chips
High pressure laminate (HPL) is hard and fairly brittle. As a saw tooth leaves the board, it pushes the laminate outwards with nothing behind it, and small flakes break away along the edge. The face where the teeth enter is pressed onto the core and usually cuts clean. The exit face is where the chips happen.
So there are two jobs: put your better face where the teeth enter, and give the exit face as much support as you can.
Choose the right blade
A blade for laminate needs plenty of teeth and the right grind.
- Triple chip grind (TCG) blades alternate a flat-topped tooth with a chamfered one. They are the usual choice for laminate and hold their edge well.
- High alternate top bevel (Hi-ATB) blades have steeply angled teeth that slice the surface. They leave a very clean edge but blunt sooner.
As a rough guide, look for around 80 teeth on a 250mm table saw blade, or 48 or more on a 160mm track saw blade. A blunt blade chips laminate however careful you are, so when the edges start getting worse, get it sharpened.
Which face goes up
The good face goes where the teeth enter the board.
| Tool | Good face | Why |
|---|---|---|
| Table saw | Up | The teeth cut down into the top face |
| Circular saw or track saw | Down | The teeth cut up into the bottom face |
| Jigsaw, standard blade | Down | The blade cuts on the up stroke |
| Jigsaw, down-cut blade | Up | The blade cuts on the down stroke |
Make a scoring cut
With laminate on both faces, the exit face still needs help. A scoring cut gives it that. Set the blade just deep enough to cut through the laminate on the exit face, about 2 to 3mm, and run along the line. Then make the full-depth cut on the same line. The shallow pass cuts the laminate while the core is still behind it, so the full cut has nothing left to break away.
Sliding table saws with a scoring blade do this in one pass. A small blade in front of the main blade scores the underside before the main blade reaches it.
Tape, inserts and support
- Masking tape. Run a strip along the cut line on the exit face and mark the line on the tape. It holds the surface together as the teeth leave. Peel it off slowly and low, so it doesn’t lift any loose flakes.
- Zero-clearance insert or splinter guard. On a table saw, a zero-clearance insert supports the laminate right up to the blade. On a track saw, the splinter guard strip on the rail does the same job, as long as it isn’t worn.
- Support the whole sheet. If the sheet sags, the cut closes and pinches the blade. If the offcut drops at the end, it snaps away with a chip from the corner. Support both sides of the line. A sheet of rigid foam insulation board on the floor makes a good bed for track saw cuts.
- Feed slowly and steadily. Don’t force the saw. Ease off for the last 100mm or so, where the offcut is most likely to break away.
Routers and jigsaws
A router with a sharp bit gives a very clean edge. A down-cut bit keeps the top face clean and suits cuts made in several shallow passes. A compression bit cuts down at the top and up at the bottom, so both laminated faces stay clean when it goes right through the board. Keep the router base flat on the board and take steady passes.
Don’t rely on a jigsaw for a finished edge. A standard blade cuts on the up stroke and pulls at the top face. If you have to use one, fit a down-cut blade, tape the line, cut just outside it and finish to the line with a router or file.
The cleanest way: a template and a router
It takes longer, but this is the cleanest way we’ve found, especially for curves and edges scribed to fit.
- Cut a template of the shape you’re scribing to from a piece of scrap ply, using a jigsaw. Sand its edge smooth, as the router will copy every bump.
- Lay the template on the laminated board where you want the cut and clamp it down.
- Cut round it with a jigsaw, about 3mm outside the line.
- Fit a bearing-guided template or flush-trim bit (a follow bit) in the router and run it round the template to take off the last 3mm.
The router does the finishing cut, so the edge normally comes out clean on both faces, with very little chance of chipping or breakout.
Edges and holes
A freshly cut HPL edge can be sharp. Take it off with a fine file or sanding block held at an angle, working towards the board so you press the laminate onto the core rather than lifting it. A few light strokes are enough.
Drill from the good face with a sharp brad-point bit. Clamp a backing board tight underneath so the bit doesn’t burst out through the far face, and let the bit cut at its own pace rather than pushing hard.
Or let us cut it for you
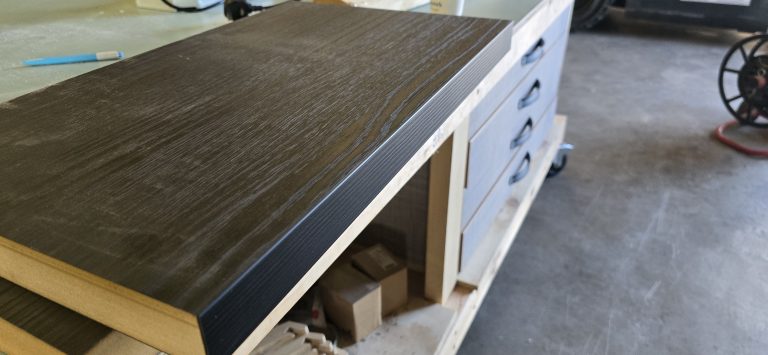
Send us a cutting list or a DXF drawing and we nest the parts and cut them on CNC. We can band the edges in the same job, with colour-matched edge banding on straight edges, on boards up to 50mm thick.
Every board is pressed to order, with a normal turnaround of two weeks from order. To pick a decor first, order a free sample of any of our 750+ decors.
Rather we cut it?
Send your cutting list or drawing with the decor, core and thickness, and we’ll come back with a quote and a sheet layout.